I’m an engineer, and am pretty clueless when it comes to film-making. However, I’ve been asked by a few different people how I made the ROS prototype to production on Ubuntu Core video series. While I’m not deluding myself into thinking I’m a pro, I’m happy with how they turned out, and they were made on a shoestring budget with open-source software. This post is for those who are curious about what I did, what I used, and how I did it.
The hardware
The camera
I don’t care how awesome you are at post-processing, there’s not a lot you can do to make up for a terrible camera. For this series, I used a Canon Rebel T5i, which is pretty good (I wouldn’t call it cheap, but it’s far from top-of-the-line).
I already owned it, but if you have the opportunity to buy a camera, here are some things to consider:
Resolution
The T5i can only shoot video in 1080p. Perhaps you’re wanting to make 4k video: you can stop right here. But perhaps you’re happy with making 1080p video: this may work fine, but you won’t be able to punch into the image at all without degrading quality (e.g. create footage like this).
Frame rate
At 1080p, the T5i maxes out at 30fps (you can get a bit more if you shoot at a lower resolution, but who wants that?). The videos I produce are 24fps, so that’s acceptable. But it means I can’t move very quickly without unacceptable blur, and I can’t do slow motion at all without it looking jumpy. You’ll notice that I do, though, and it doesn’t look jumpy. I faked it: the robot was barely moving. The “slow motion” was really full-speed, and the faster stuff was sped up. Yeah, I recommend a higher-frame-rate camera if you’re able to swing it (assuming you love slow-mo vibes as much as I do).
Formats
When I shoot photos I shoot in RAW, and edit them in Darktable. When I purchased the camera that’s really all I wanted, but now that I’m making video with it I’m saddened by the fact that, when making video, it only supports h264. I think I could get more out of it if I used Magic Lantern, but just because I run Linux doesn’t mean I want to tinker with everything (there’s a reason I use Ubuntu). Perhaps I’ll get there eventually, but until then, the alterations I can make while editing are somewhat limited.
The microphone
Camera microphones are even worse than the microphones built into your laptop. If you actually need audio while you’re taking the video (e.g. recording an interview), I recommend something like the Rode NTG4. I’d love one of those. Fortunately, I had no need to use audio from the video. I could record the footage and then voice over it later. I actually do voice work for radio, so I happen to already have a good mic (an MXL 009, to be specific).
Lighting
I shot all the footage for the series in my living room and kitchen (had to kick the family out every time, they loved that). There are some big windows in there and a good amount of daylight, but I was shooting toward the middle of the house, and the light just wasn’t good enough to shoot at the ISO I wanted (800 or less), so I needed some lights. However, I liked how the light coming from the windows looked, so I wanted to make sure I kept that appearance. I did some research, and decided I wanted a soft box. Two, actually: a key light, and a fill light (to soften the shadows made by the key light). I ran into a few issues here:
- The soft boxes themselves are not that expensive, but the lights that go inside them can be. I was probably looking at a few hundred bucks (at least).
- Even if Canonical was okay with that cost (I doubted they would be), I needed to order them and I was on a deadline (anyone else notice that Amazon’s two-day shipping == five-day shipping these days?)
So I went with an alternative.
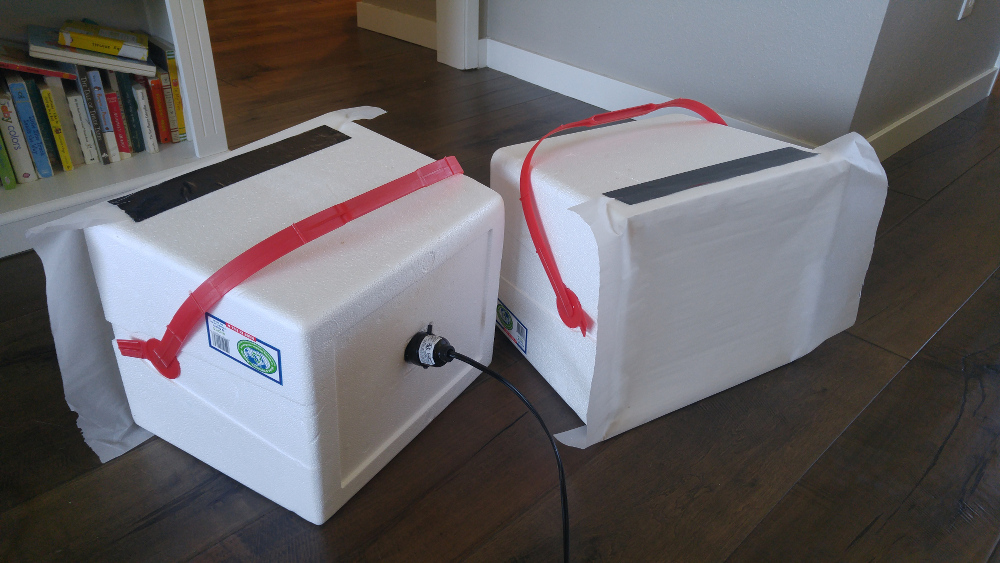
What you see here is a cheap styrofoam cooler covered in parchment paper to diffuse the light. I poked a work lamp through the back of it and put a daylight (5700K) LED bulb in there. I made two of them. Not durable in the least but they worked well for this project and still exist, so apparently durable enough.
Note: I selected LED bulbs because I didn’t want to put anything hot inside styrofoam, but if you’re using a fast shutter speed, beware of flicker. I was using commercial LED bulbs, and they flickered quite a bit if I went too high.
Often a three-point light system is used that includes a back light, but I found the light coming from the windows worked well enough for that. How I positioned the lights varied depending on the shot I was trying to get, but most of the time it looked something like this (the vertical lines are the windows):
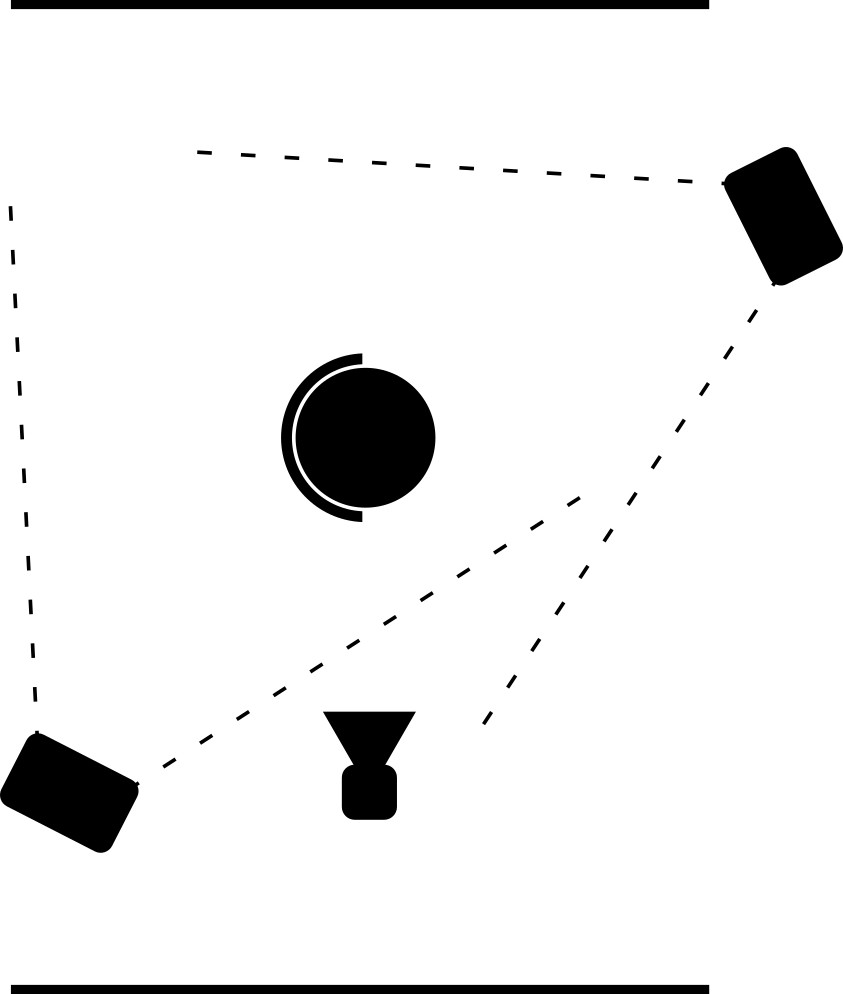
The most difficult parts were the moving shots, where I really didn’t want to cast a shadow by crossing the light and the subject. Those shots were obtained by rotating the light setup a bit, or putting lights on chairs, etc. I never moved the lights while shooting to keep it looking like the light was coming from windows.
Slider
Lots of the footage I captured was in motion, with most of it at floor-level. I needed to move slowly and smoothly, which meant some sort of slider/dolly track. Those can start getting up there in price, and again, I had no time. I really wanted to make one of these, but decided I didn’t have time for that either. So again, I went with an alternative.
Even this I had to get on loan from my two year old.
My wooden floors have a texture to them that make them lovely to look at and walk on, but dreadful for moving my professional-grade slider smoothly, so my yoga mat is there to even it out.
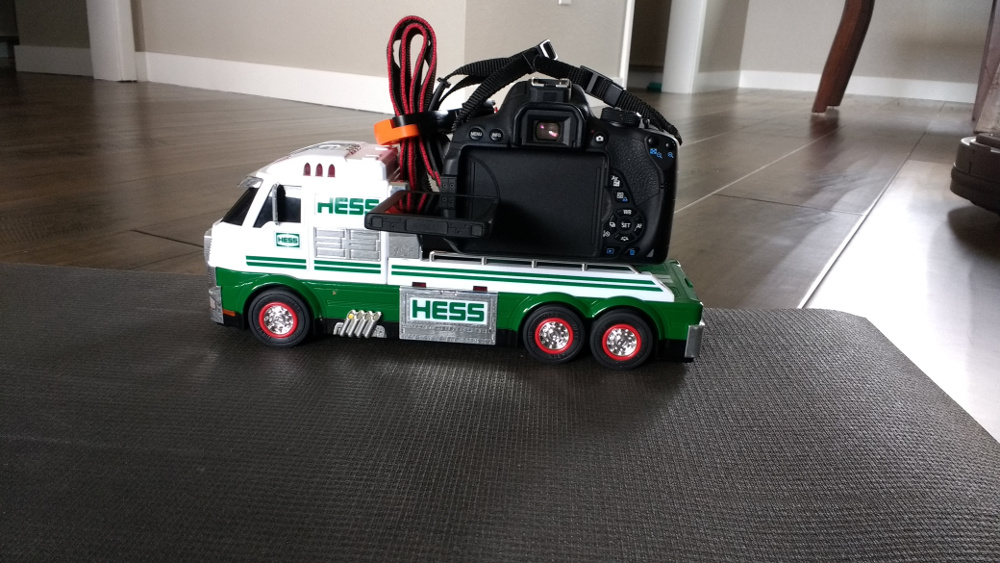
This setup worked for the situations when I was shooting alongside the action (e.g. the intro for part 1), but there were other times when I needed to move straight toward the action, when the yoga mat would be in the way. Also, the Hess 2016 Edition does not have a nice way to mount the camera facing forward. I should complain. Regardless, when moving along the rough floor I found painted (i.e. slick) cardboard worked acceptably well.
You’ll see footage captured from that in the intro for part 1 as well as part 2. The moving footage well above the floor was done via a tripod set on this same piece of cardboard. A fluid head would have been handy.
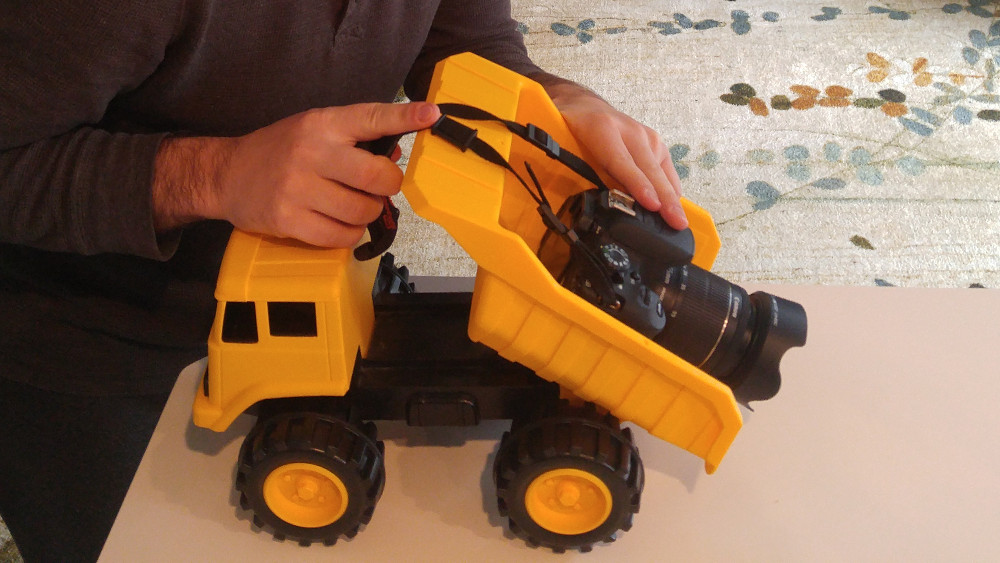
In the intro for part 5 I needed to get some moving footage where I was front-facing and tilted downward, very close to the surface of my kitchen counter. The mount situation on the Hess bit me here, so I had to break out the Adventure Wheels.
The software
Capturing my screen
Man, I’ll tell you. The screen recording software situation on Linux is so sad. I would say it’s like a barren wasteland, except that there are several options. All of which suck. I think I tried them all. Every one of them either couldn’t handle my 4k screen (recording only the upper-left quarter of it) or the color was way off.
The least bad option was RecordMyDesktop. It was the one exception to the previous broad brush: it could handle 4k and the colors looked okay. It was insanely slow and was only happy recording at 15fps (I tried switching to 24 and it ended up a garbled mess), and even then a bunch of frames got encoded out of order. Watch some of my videos closely: that wasn’t a typo that got deleted and re-typed, it was RecordMyDesktop shuffling frames randomly. But it did the job well enough.
You might be asking: “Why didn’t you just bump your resolution down to 1920x1080 to record?” First of all, I shouldn’t have to. Really though, it’s because I wanted to be able to zoom into portions of the video without losing quality (e.g. step 1 of the video for part 4).
Most of my recordings were of full-screen applications: I’d make them full-screen (which hid the clock and task bar), make the text larger so things would be readable on a smaller video, select that window within RecordMyDesktop, and start recording.
I did things in the smallest chunks possible, because RecordMyDesktop would take ages to encode. For example, if I needed to show three separate commands in the terminal one after the other, I’d record each of them in separate takes, simply making sure not to touch the terminal between takes so they pieced together nicely. I didn’t fake anything here, although I certainly sped pieces up in post-processing.
After I was done, I’d hand them off to ffmpeg to convert from 15fps to 24 so I didn’t need to deal with different framerates in Blender. I wish RecordMyDesktop would just do that for me.
Recording audio
I have a lot of experience with Audacity, so that was my obvious choice. However, this time around (running v2.1.2 on Xenial) I ran into some stability issues. It crashed on me about once a session, and it didn’t always cut the track where I actually asked it to cut (sometimes I didn’t notice and ended up having to re-record a track). I still used it, and it did a good job of recovering when it crashed, but that was frustrating. Your mileage may vary (at least on that version). (Update: On Bionic, Audacity no longer seems to be crashing, but it’ll still cut weird. I’ve started copying the original recordings into their own project before starting any editing.)
I recorded each paragraph of the script as a separate track, edited them individually (e.g. removed the whirring sound of my server in the background), and then used “export multiple” to export them all at once so I could put them where they needed to go in the video editor.
Video editor
Believe it or not, I use one of the prides of open-source: Blender. You’re thinking “Wait, isn’t Blender a 3D modeling program?” Yes, it is. But it also has the best video sequence editor (VSE) I’ve ever used. In fact, the only time I used its 3D capabilities was for the title floating in on part 5. You probably didn’t notice. It took me four hours. Shut up.
Blender is rock solid, but it has a lot of features and can be difficult to learn. Mike Meyers (mikeycal) created an excellent series of tutorials for learning pretty much everything you need to know about the VSE, and I can’t recommend it enough.
The only feature that’s missing at least in v2.76 that I’m using on Xenial is a simple way to do good-looking text. It has a text effect, but there’s no font control so it ends up just making me laugh. It sounds like they’re well aware of the limitation though– I expect this is already fixed in later versions.
As a work-around, I used Inkscape (and the wonderful Ubuntu font) to create the text you see in the videos. I made sure to place all the text in the same place (aligned left, vertically centered) and exported the entire page as a transparent PNG (so every text image was the same size). This allowed me to easily align the text in the editor and be confident they were all the same size.
You’ll see that it took me a few videos to converge on a style: part 1 brought text into frame in a way that I felt was slightly gimmicky, so improving the text was a large focus in part 2. I liked that better, and you’ll see that I continued that style throughout the rest of the series.
Editing took the majority of my time for each video, but it went faster as I gained experience. For example, editing was always the last step, but the order in which I actually did the editing morphed over time. For the first video, I pretty much perfected the video before adding the audio in. Then I realized that I had too much audio for the cuts I made, so I had to do all the cutting and transition work again. Like the efficient machine I am, I went through pretty much the same process for part 2 before I realized how much time I was wasting. Things went much smoother once I started importing all the raw footage and audio at the same time and aligning them before working on any cutting or transitions. Seems obvious in retrospect.
Conclusion
I had a good time with this project, and I see more videos in my future. I’ll probably slowly purchase better gear as time goes on, starting with a better slider and fluid head. But for the most part, this process worked well, and cost very little. I hope this post helps somebody out there!