
I’m currently the maintainer of the ownCloud snap. One of the primary target devices for this snap is a Raspberry Pi 2, which is of course armhf. Snapcraft solves a lot of problems when building snaps, but one issue it doesn’t solve is cross-building (i.e. building on one architecture while targeting another). Back in Snappy Ubuntu Core 15.04, every ownCloud release I made for armhf was built on the Raspberry Pi 2. What a painful experience that was– it needed more RAM than the rpi2 had (so I needed to enable swap), and it took literally all day to build.
Nowadays there’s a much, much better way. Snapcraft still doesn’t fully support cross-building, but the Launchpad team recently introduced snap builders for several different architectures that run on very high-end hardware– available for free, for everyone! The only downside is that they aren’t very well documented. Maybe I can help with that.
What are you talking about?
The Launchpad snap builders are server instances spun up on demand with the sole purpose of building snaps using Snapcraft in a clean environment. They have servers for several different architectures– at the time of this writing, amd64, x86, arm64, armhf, and ppc64. I strongly encourage you to use them.
How do I use them?
First of all, you need a Launchpad account. Once you have that, you just need your code in a branch on Launchpad. You can do that by creating a project and associating you code with it, or by pushing to the +junk pseudo project. I’ll walk you through using a project, but the +junk project is really no different, it just cuts down a step. Launchpad supports both bzr and git– I’ll use git in this example.
Step 1: Register a project
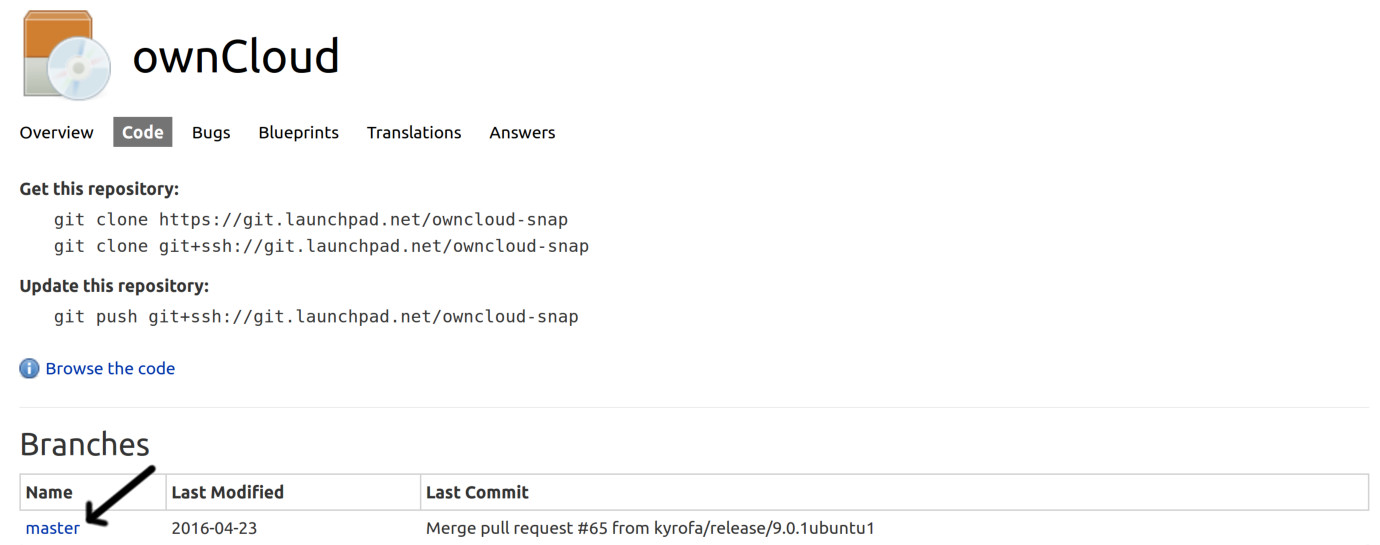
Go ahead and create a project with which the code will be associated. I called mine “owncloud-snap”.
Step 2: Push the code
Since the ownCloud snap is hosted in GitHub, I just needed to add Launchpad as a remote and push up my branch:
$ git remote add lp git+ssh://kyrofa@git.launchpad.net/owncloud-snap
$ git push lp master
Now you should see your new branch in the Code tab of your project (e.g. here’s ownCloud’s).
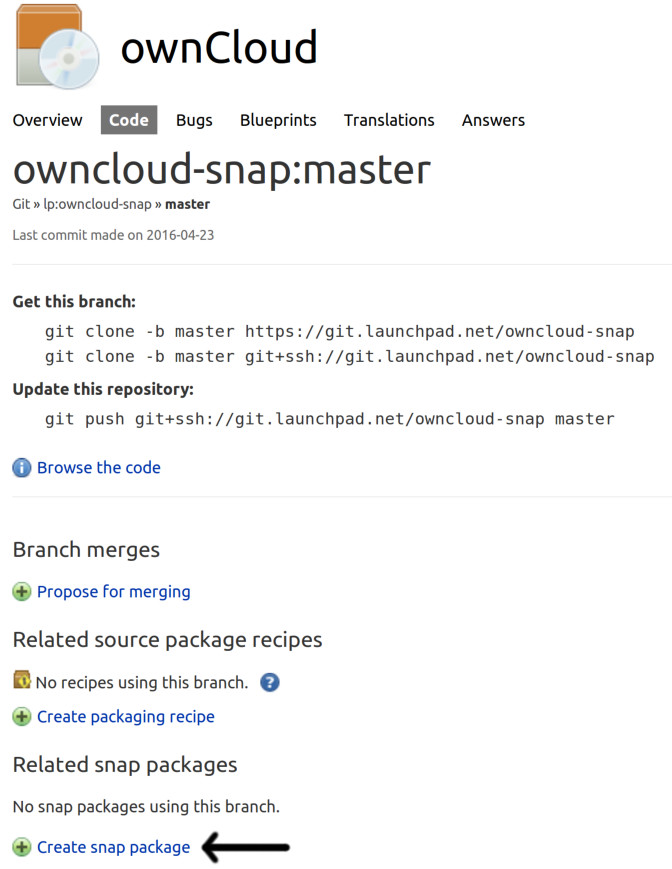
Step 3: Create a snap associated with the branch you just pushed
Select the new branch in the Code tab. One of the options you’ll see is “Create snap package.”
Select that, and you’ll be able to name your snap, and specify what distribution to use.
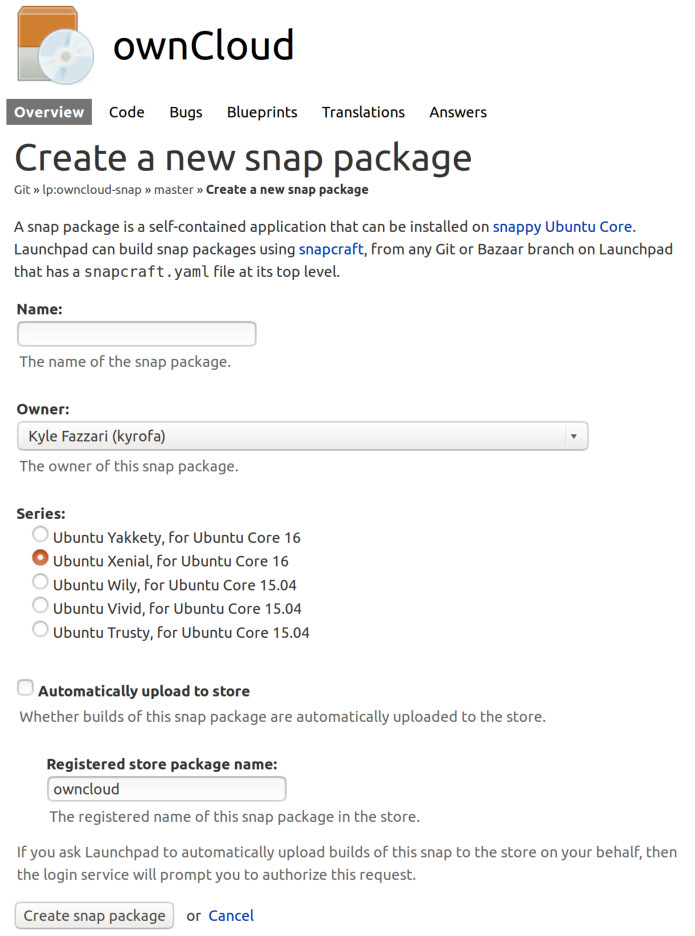
There are many options here, but you either want to select Vivid (if targeting Snappy Ubuntu Core 15.04) or Xenial (if targeting Snappy Ubuntu Core 16)– ignore the rest. You can even opt to automatically upload completed snaps to the store here if you like. When you’re happy the settings, select “Create snap package.”
Step 4: Make sure it’s using the architectures you want.
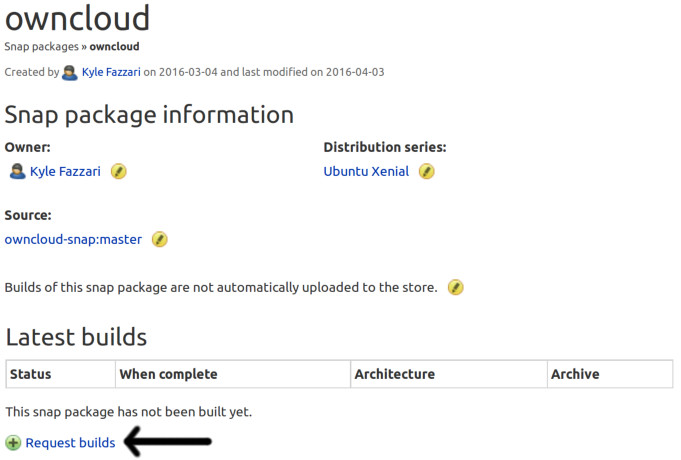
After completing step 3 you should be on the “Snap package information” page for the snap you just created. By default (at least at the time of this writing), snaps are only built for amd64 and x86.
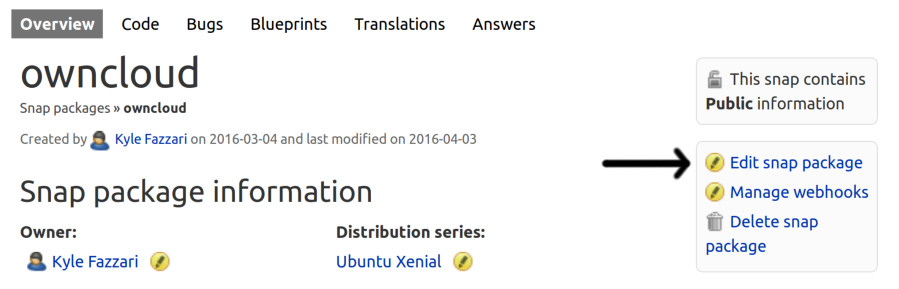
On the right, select “Edit snap package” and you’ll be able to select other architectures for which the snap will build. The store will accept any of these architectures, but you’ll see I’m only building for the four main ones.
Step 5: Build it!
Now that it’s configured for the architectures you want, get back on the “Snap package information” page and select “Request builds.”
Select the architectures for which you’d like to build (note the options here are limited to what you selected in step 4), as well as the pocket to use for building the snap. Pockets are essentially “sections” of the archive. The Release pocket reflects things as they were when that version of Ubuntu was released. Updates (the default) reflects all the updates that the version of Ubuntu has received since release. Security reflects security updates that the version has received since release… you get the idea. I always use Updates unless there’s a good reason not to, particularly because that’s where the Snapcraft updates land. Anyway, once you select your options, go ahead and hit “Request builds.”
Step 6: Hang out for a bit. But definitely not a day.
Sit back and relax while Launchpad spins up some instances and runs Snapcraft for you! For the ownCloud snap, which as I said took an entire day to build on the rpi2, Launchpad cranked out a snap for amd64, x86, arm64 and armhf in about 40 minutes. Total. Oh yes.
Step 7: Grab the built snap and use it.
Once a build has completed, it’ll give you a link to the built snap.
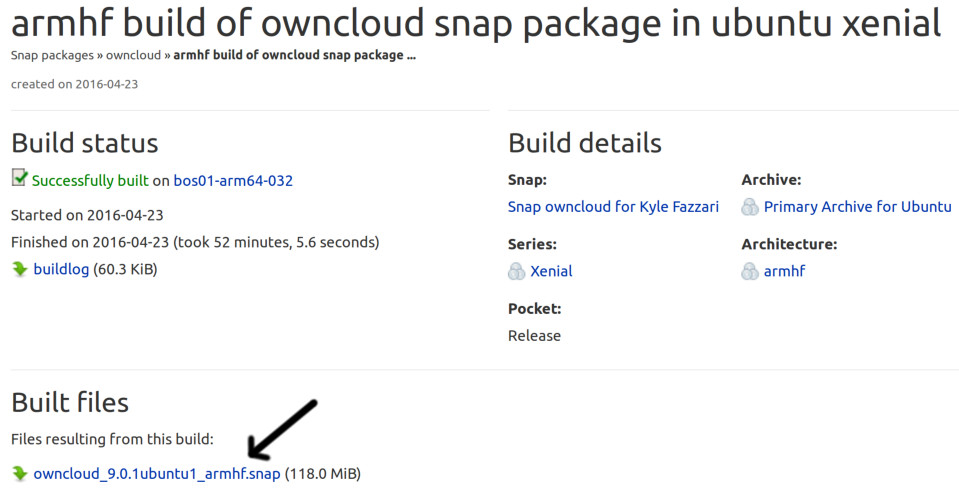
You can download it from there and sideload it right away, or upload it to the store and publish it (assuming you didn’t request Launchpad to do that for you)!
Limitations
Now, I love the Launchpad builders, but there are a few limitations of which you should be aware.
- Internet access is only available in the pull step. If your build step for instance tries to hit the internet, it’ll fail. Refactor your snapcraft.yaml if necessary. (Update: This is no longer true, you should be able to hit the internet in any step now).
- The builders are still beta. Sometimes proxy tokens time out, or other infrastructure-related issues occur. You’ll get an email if the builds fail with a link to the build log– take a look, and if it looks infrastructure-related, just request a new build.
If you run into any other issues, or have questions, hop in the #launchpad channel in Freenode and ask away!